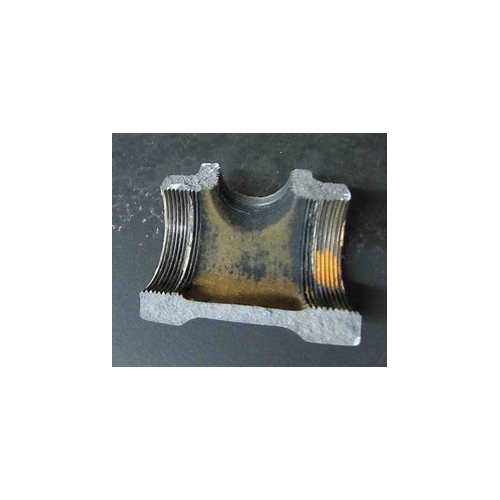
Failure Analysis
Failure Analysis Specification
- Interface
- Digital/Analog output interfaces available
- Frequency
- 50/60 Hz
- Measuring Range
- Application-dependent, customizable
- Power
- 10-500W (as per model)
- Display
- Digital LCD/LED display
- Voltage
- 110-240V AC or as per requirement
- Weight
- Variable (application dependent)
- Driven Type
- Electric
- Temperature
- -20C to 60C Operating Range
- Size
- Standard/customized
- Material
- ABS plastic, metal alloys
- Usage & Applications
- For analyzing root cause of product/equipment failure in engineering, manufacturing, automotive, electronics, and other industries
- Data Storage
- Internal/external memory, USB export
- Environment
- Indoor/Outdoor application, dust and moisture resistant
- Analysis Methods
- Non-destructive testing (NDT), Metallography, SEM, X-Ray, Thermal Imaging
- Accuracy
- High precision, up to 0.01% deviation
- Software Compatibility
- Compatible with leading analysis software and PC interfaces
About Failure Analysis
Metallic failure analysis is a crucial process in understanding why metal components fail to perform as expected. This analysis helps in identifying the root cause of the failure, which can be due to various factors such as material defects, manufacturing issues, or operational conditions.
Key Steps in Metallic Failure Analysis:
- Visual Inspection: The first step involves a thorough visual examination of the failed component to identify any obvious signs of damage or wear.
- Non-Destructive Testing (NDT): Techniques like ultrasonic testing, radiography, and magnetic particle inspection are used to detect internal defects without damaging the component.
- Microscopic Examination: Using optical and electron microscopes to study the microstructure of the material and identify any microscopic defects or anomalies.
- Chemical Analysis: Determining the chemical composition of the material to check for any impurities or deviations from the specified alloy composition.
- Mechanical Testing: Assessing the mechanical properties of the material, such as hardness, tensile strength, and impact resistance, to ensure they meet the required standards.
- Fractography: Analyzing the fracture surface of the failed component to identify the mode of failure (e.g., brittle, ductile, fatigue, or corrosion).
- Root Cause Analysis: Combining all the gathered data to determine the primary cause of the failure and suggest corrective actions to prevent future occurrences.
Common Failure Modes:
- Brittle Fracture: Sudden failure without significant deformation, often due to low temperatures or high strain rates.
- Ductile Fracture: Failure after significant plastic deformation, usually due to overload or material fatigue.
- Fatigue: Progressive failure due to cyclic loading, leading to crack initiation and propagation.
- Corrosion: Degradation of the material due to chemical reactions with the environment, leading to pitting, stress corrosion cracking, or intergranular corrosion.
Advanced Analysis Methods for Comprehensive Results
Our solutions employ an array of techniques including NDT, Metallography, SEM, X-Ray, and Thermal Imaging. These methods allow for a thorough inspection without damaging the product, ensuring accurate failure root cause analysis in various industrial applications.
Seamless Software and Interface Compatibility
Designed for efficiency, our systems integrate with the leading analysis software and feature both digital and analog output interfaces. This flexibility ensures straightforward data transfer and compatibility with various PC setups, streamlining your analysis workflow.
Reliable Performance in Diverse Environments
Constructed from robust ABS plastic and metal alloys, our products are optimized for both indoor and outdoor use. With dust and moisture resistance, standard/custom sizing, and operation in temperatures from -20C to 60C, they are built to withstand tough working conditions.
FAQ's of Failure Analysis:
Q: How does failure analysis using your systems help identify the root cause of equipment or product failures?
A: Our failure analysis systems combine advanced technologies like NDT, Metallography, SEM, X-Ray, and Thermal Imaging to non-invasively examine components. This multi-method approach enables precise identification of material defects, structural integrity issues, and hidden faults, leading to accurate determination of failure causes.Q: What industries can benefit from your failure analysis tools and methods?
A: Our products are suitable for a diverse range of sectors including engineering, manufacturing, automotive, electronics, and other industrial fields. The techniques and equipment are adaptable to various applications, ensuring solutions for multiple types of failure analysis challenges.Q: When is it advisable to use non-destructive testing (NDT) during the failure analysis process?
A: NDT is particularly useful when you need to detect subsurface defects or anomalies without damaging the original part. It is best applied during initial diagnosis, routine maintenance checks, or when sample preservation is crucial for further investigation or record-keeping.Q: Where can your failure analysis products be used, considering environmental and operational requirements?
A: Our equipment is designed for indoor and outdoor use. With dust and moisture resistance, and an operational temperature range of -20C to 60C, they function reliably in production plants, field locations, laboratories, and other demanding environments.Q: What are the data storage and export options provided by your failure analysis systems?
A: The systems offer both internal and external data storage solutions, with convenient USB export functionality. This ensures secure archiving of results and hassle-free integration into your digital record systems or analysis software.Q: How does high accuracy, such as up to 0.01% deviation, benefit the failure analysis process?
A: High-precision readings enable detailed examination and reduce the risk of diagnostic errors. This accuracy ensures that even minor deviations or defects are detected, supporting more reliable maintenance decisions and improved product quality control.
- Minimum Order Quantity
- 1 Unit
Tell us about your requirement

Price:
Quantity
Select Unit
- 50
- 100
- 200
- 250
- 500
- 1000+
Additional detail
Mobile number
Email


